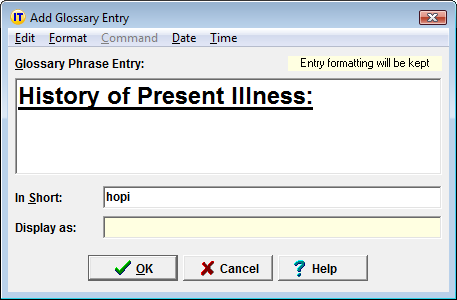
Instant Text is able to store formatting attributes – such as bold, italic, underline, color, and font – with a glossary entry. The easiest way to do this is to highlight formatted text and type Alt+= to copy it to the Glossary Entry editor. Then, type Alt+F+Enter or click on the Format menu and select the Keep Format menu item. Finally type Enter to create the entry.
After
selecting the Keep Format
menu item, the Format menu changes to
propose a No Format
menu item and the top right indicates Entry formatting will be kept.
Formatting information that can be kept includes font type, font size, font style, and font color, as well as paragraph format information. To remove format information, click on the Format menu and select the No Format menu item.
Only Phrase Entries can store formatting. To keep a single word as a formatted entry, assign it a short form with two or more letters.
When a formatted entry shows up in the Phrase Advisory, it is always displayed using its display form. By default the display form of a formatted entry is the unformatted text of the entry enclosed by angle quotes (chevrons). For example, the entry we just created will be displayed as follows:
«History of Present Illness:»
When you expand a formatted entry, the format attributes of the last character are used for the text that follows the expansion. For example, if you create the entry "bold red" any character typed after expanding this entry is bold and red. If this is not the desired effect, you should create the entry as "bold red " with a final space non-bold and in default paragraph font.
Note on Smart Cut and Paste
MS Word and several other applications have a feature called Smart Cut and Paste that removes trailing spaces in text retrieved from the clipboard. If you are using formatted entries, you should disable this feature as it will negate the final space you need to go back to normal font.